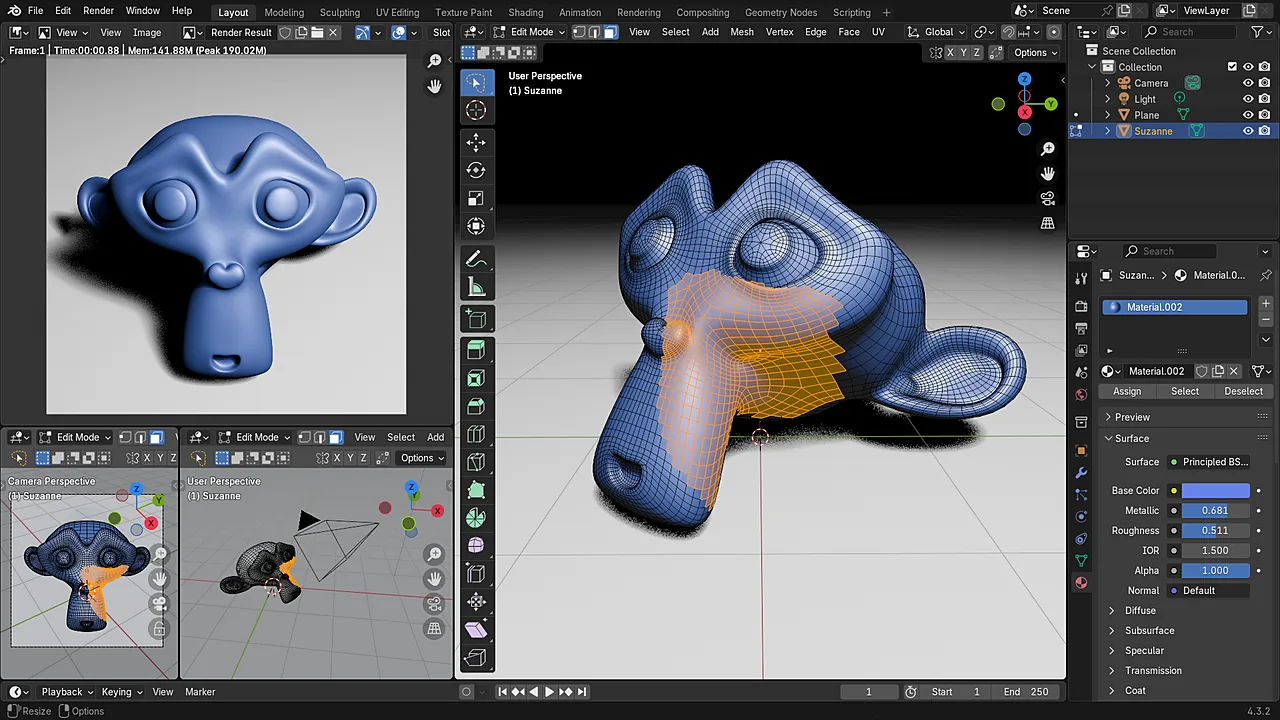
Blender is professional 3D software — modeling, sculpting, animation, rendering, and video editing — and it is genuinely free: open source, no trial period, no license key, ever. The only download that matters comes from blender.org. This guide covers picking the right version for your hardware, installing it on Windows, macOS, or Linux, and fixing the most common first-launch problems.
Last checked: September 2026. Current release: Blender 5.2 LTS (5.2.1); Blender 4.5 LTS is still supported.
Which version should you install?
- Latest LTS (currently 5.2) — the right default. LTS releases get two years of bug fixes and are what studios pin their projects to.
- Previous LTS (4.5) — choose this if a course, add-on, or studio pipeline you depend on has not moved to the 5.x series yet.
- Older hardware? Blender raises its GPU requirements over time. If 5.x refuses to start on an aging machine, an earlier LTS like 4.5 — or 3.6 for genuinely old GPUs — often runs fine. All past releases stay downloadable from blender.org.
Ignore any site selling Blender, offering a “cracked” copy, or wrapping it in a custom installer. The full program is free at blender.org/download; anything else only adds risk.
Before you install
Blender needs a 64-bit system and benefits enormously from a dedicated GPU — Cycles rendering on a supported graphics card is many times faster than on a CPU. 8 GB of RAM is a workable minimum for learning; 16–32 GB is comfortable for real scenes. The exact, current list is on the official requirements page; check it if your machine is older, because minimums move with each series.
Install on Windows
- Download the Windows installer (.msi) from blender.org/download.
- Run it and click through — the defaults are sensible and it does not bundle anything.
- Launch Blender from the Start menu. On the first splash screen, accept the quick setup (keymap, theme) unless you are migrating settings from an earlier version, which it will offer to import automatically.
Two alternatives are worth knowing. The portable .zip build needs no installation — unzip and run blender.exe, handy on a work machine without admin rights. Installing through Steam or the Microsoft Store gets you automatic updates within a release series.
Install on macOS and Linux
- macOS: download the .dmg (separate builds for Apple Silicon and Intel), open it, and drag Blender into Applications.
- Linux: the portable .tar.xz from blender.org runs anywhere; distribution repositories and Snap ship it too, usually a minor version behind. If you render on GPU, install your GPU vendor’s compute stack (CUDA/HIP/oneAPI) that matches your driver.

If Blender won’t start or crashes on launch
- Update the GPU driver first. This fixes the majority of startup crashes, especially after a new Blender series raises its graphics requirements. Get the driver from NVIDIA, AMD, or Intel directly — not from Windows Update.
- Hybrid-GPU laptop opens Blender on the weak GPU. In Windows Settings → Display → Graphics, add blender.exe and force it to the high-performance GPU.
- Still crashing on old hardware? Try the previous LTS from the same download page. If 4.5 runs where 5.2 does not, your GPU has hit the newer series’ floor.
- Broken after fiddling with preferences or add-ons? Start Blender, then File → Defaults → Load Factory Settings — or launch it once with the
--factory-startupflag to confirm an add-on is the culprit.
First steps that pay off
Blender’s learning curve is real but front-loaded. Two habits make the difference in week one: learn the viewport navigation (orbit, pan, zoom) until it is muscle memory, and follow one structured beginner series to the end instead of sampling ten. The bundled Suzanne monkey model — visible in this article’s screenshots — exists precisely for that kind of practice.
Related on AppInstall.info: keep creative apps updated with winget, and browse the best utility software.
Featured image: Blender 4.3 interface — screenshot by UnnecessaryDecision / Wikimedia Commons, CC0.